
How to Add Location Labels to Real Estate Drone Photos
Discover how to add location labels to real estate drone photos. Learn how photographers highlight nearby schools, parks, shopping centres, transport and other points of interest to create more engaging property marketing images.
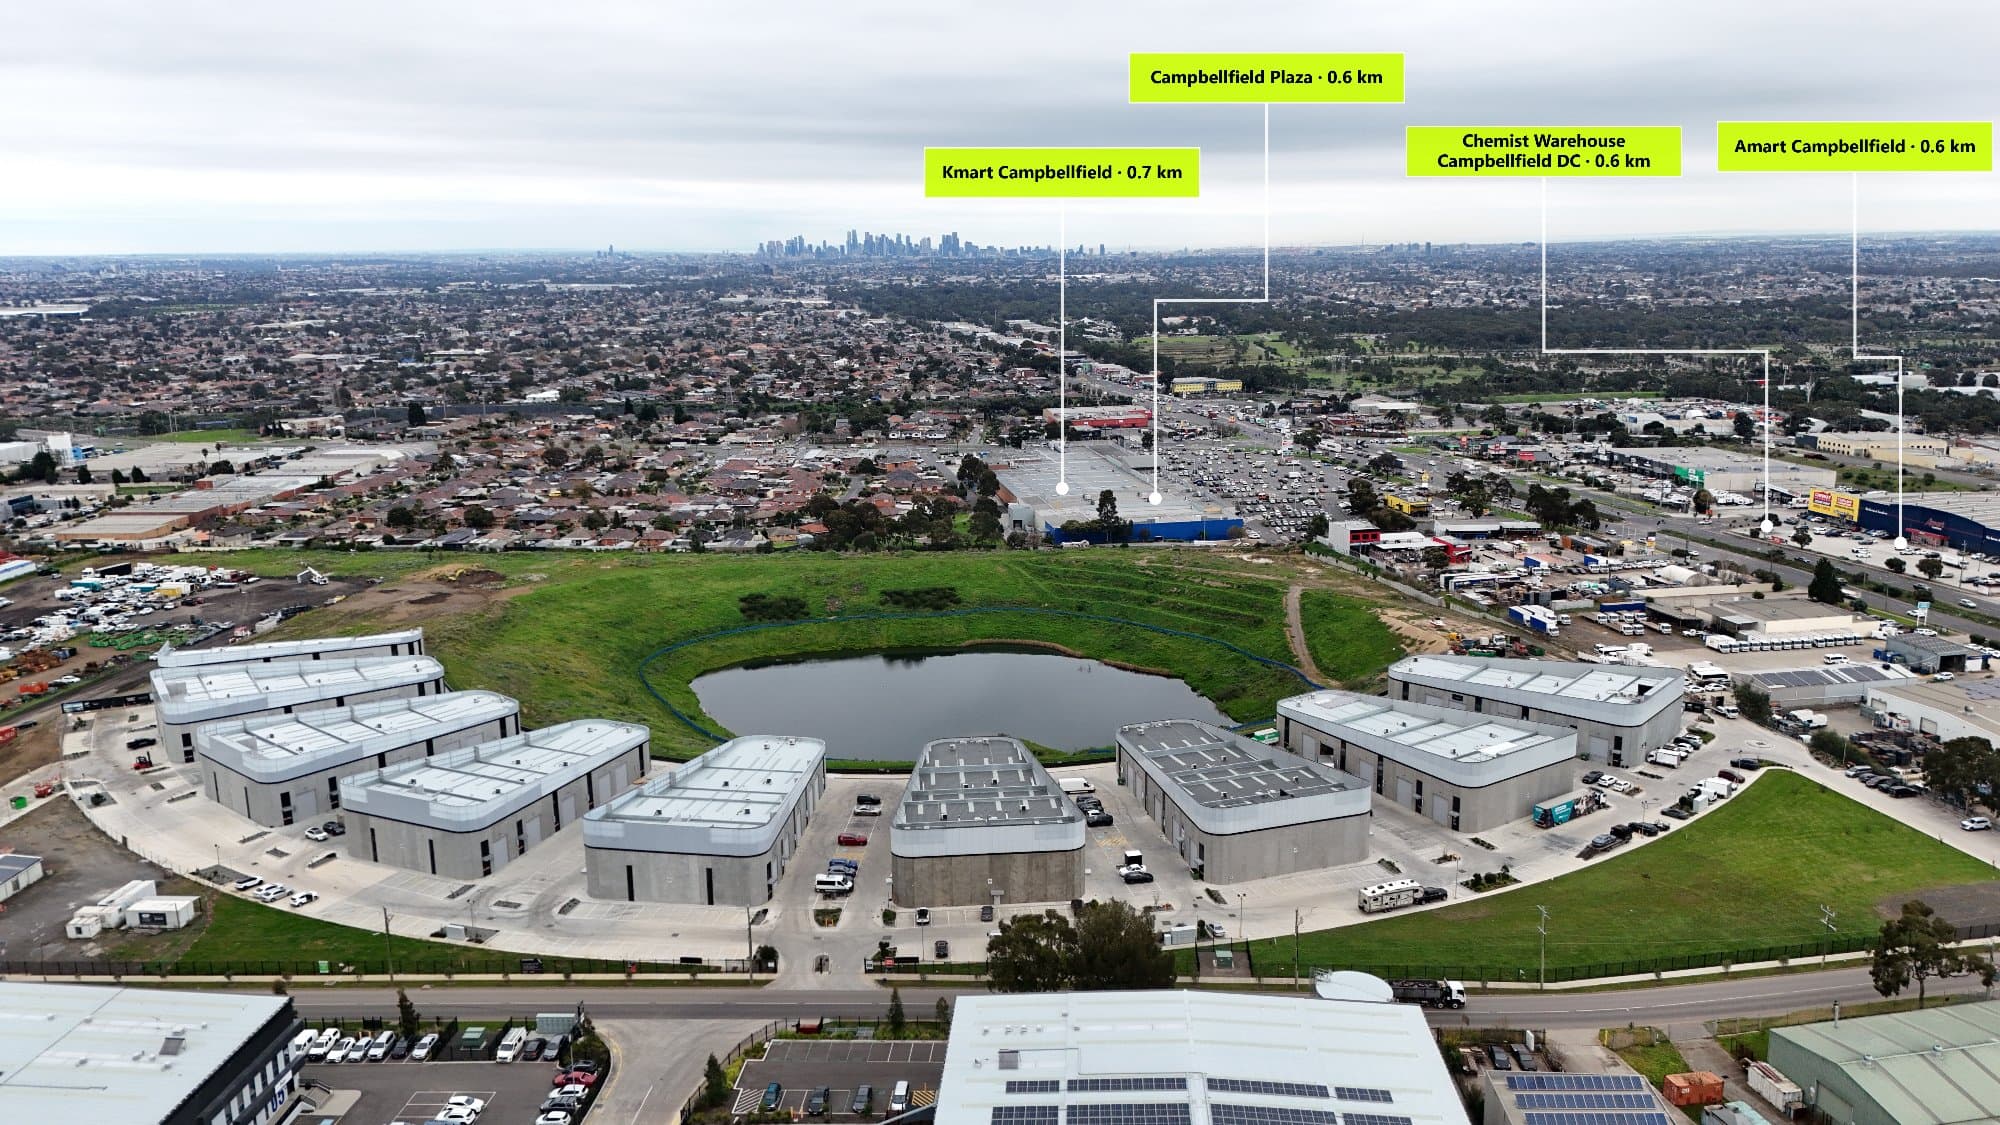
Real estate drone photography is one of the best ways to showcase a property, but a standard aerial image only shows part of the story. Adding location labels to drone photos helps buyers understand the surrounding area and see the lifestyle benefits that come with the property.
By highlighting nearby schools, parks, shopping centres, transport, and local attractions, you can turn a simple aerial photo into a powerful marketing tool.
Why Add Location Labels to Real Estate Drone Photos?
Most buyers are not only searching for a home—they are searching for a location.
A drone photo with clear location labels helps answer important questions:
- How close is the property to schools?
- Where is the nearest shopping centre?
- How far away is public transport?
- What parks and recreation areas are nearby?
- What makes this suburb attractive?
Instead of asking buyers to research the area themselves, you can provide valuable information directly on the image.
What Are Location Labels on Drone Photos?
Location labels are markers added to aerial images that show important nearby places.
Common real estate drone photo labels include:
- Schools
- Parks
- Playgrounds
- Train stations
- Shopping centres
- Cafés
- Restaurants
- Beaches
- Hospitals
- Universities
- Sporting facilities
These points of interest help buyers quickly understand the property's surroundings.
How to Add Location Labels to Drone Photos
1. Capture a Wide Drone Image
Start with a high-quality aerial photo that shows the property and surrounding neighbourhood.
A wider image gives you more space to highlight nearby amenities while keeping the property as the main focus.
2. Find Important Nearby Locations
Choose points of interest that matter to potential buyers.
For example:
A family home may benefit from:
- Nearby schools
- Parks
- Childcare centres
- Shopping
An apartment may benefit from:
- Public transport
- Restaurants
- Entertainment
- Work locations
3. Add Clear and Professional Markers
Good annotations should be easy to understand.
Use:
- Simple icons
- Short labels
- Clean lines
- Consistent styling
Avoid adding too many markers, as clutter can make the image harder to read.
4. Export a High-Quality Image
Your final drone photo should look professional across:
- Real estate websites
- Property portals
- Social media
- Marketing brochures
Always check that labels remain readable after exporting.
The Best Way to Automatically Add Location Labels
Manually finding every nearby location can take a lot of time. Searching maps, copying names, and placing every marker becomes repetitive when creating multiple property listings.
AerialPin helps real estate photographers quickly add nearby Points of Interest to drone images.
With AerialPin, you can:
- Find nearby locations automatically
- Add professional POI markers
- Create engaging aerial property images
- Save time during editing
- Deliver premium marketing material to clients
Why Real Estate Agents Should Use Annotated Drone Photos
For agents, better visuals can help properties stand out in competitive markets.
Annotated aerial images can:
- Improve listing presentation
- Show the value of the location
- Help buyers understand the neighbourhood
- Create more engaging marketing content
- Provide extra value to sellers
A property is more than just the house—the surrounding area plays a major role in a buyer's decision.
Final Thoughts
Adding location labels to real estate drone photos is a simple way to create more informative and professional property marketing.
Instead of showing buyers only where the home is located, you can show them what life around the home looks like.
With tools like AerialPin, creating professional aerial images with nearby Points of Interest becomes faster, easier, and more effective.