
How to Annotate Drone Photos for Real Estate Listings
Learn how to annotate drone photos for real estate with points of interest, labels, and nearby amenities to create more engaging property listings.
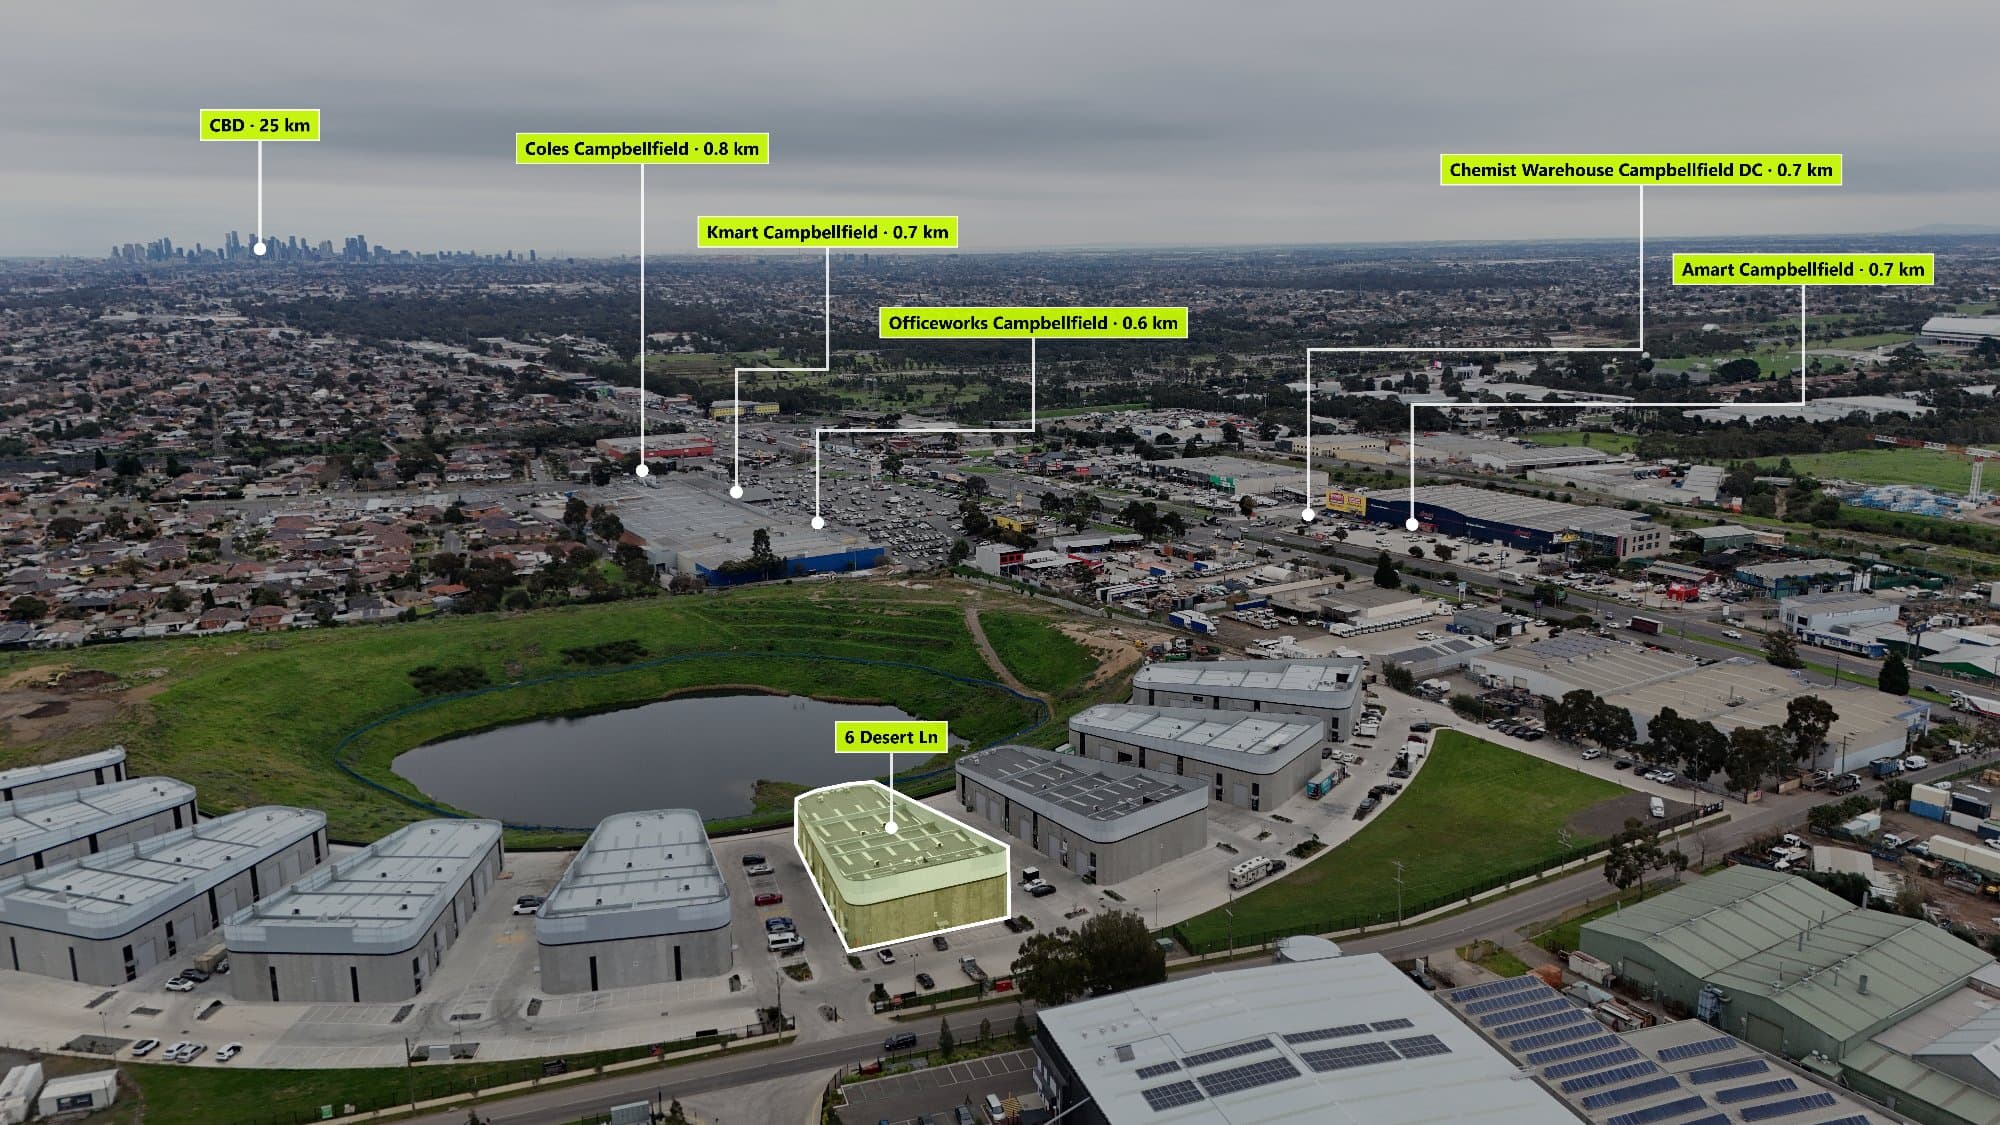
Drone photography gives buyers a unique perspective of a property, but sometimes an aerial image alone doesn't tell the full story. By adding annotations to drone photos, you can clearly show nearby schools, parks, shopping centres, transport links, and other important landmarks that help buyers understand the property's location.
Whether you're a real estate photographer, agent, or marketing professional, learning how to annotate drone photos can make your listings more engaging and informative.
What Is a Drone Photo Annotation?
A drone photo annotation is a label, icon, or marker added to an aerial image to identify important locations around a property. These annotations make it easier for buyers to see what amenities are nearby without having to search on a map.
Common annotations include:
- Schools
- Parks
- Shopping centres
- Train stations
- Beaches
- Hospitals
- Cafés
- Universities
- Sporting facilities
- Major roads
A well-annotated drone image gives buyers valuable context and helps properties stand out online.
Why Annotated Drone Photos Improve Property Listings
Adding annotations to aerial images provides several advantages:
- Shows buyers what is close to the property.
- Makes listings more visually appealing.
- Helps buyers compare locations quickly.
- Creates professional marketing materials.
- Adds extra value to your real estate photography services.
Instead of simply showing a house from above, annotated drone photos tell the complete story of the surrounding neighbourhood.
How to Annotate a Drone Photo
1. Capture a Wide Aerial Image
Start with a high-resolution drone photo that includes the property and surrounding streets. A wider view gives you more room to highlight nearby amenities.
2. Find Nearby Landmarks
Identify locations buyers care about most, such as schools, shopping centres, public transport, parks, medical centres, and recreation facilities.
3. Add Clear Labels
Keep your annotations clean and easy to read by using consistent icons, short labels, and simple connecting lines.
Avoid overcrowding the image with too many markers.
4. Check Accuracy
Always ensure each marker points to the correct location. Accurate annotations build trust and provide genuine value to buyers.
5. Export in High Resolution
Once complete, export the image in high quality so the labels remain sharp across websites, brochures, and property portals.
The Faster Way to Annotate Drone Photos
Manually searching maps and placing markers can take a considerable amount of time, especially if you're editing multiple properties every week.
With AerialPin, you can automatically discover nearby points of interest, search thousands of locations, and add professional annotations in just a few clicks. The platform is designed specifically for real estate photographers who want to produce polished aerial images quickly and consistently.
Learn more at www.aerialpin.com, explore the available tools at www.aerialpin.com/features, or view plans at www.aerialpin.com/pricing.
Final Thoughts
Annotated drone photos have become an essential part of modern real estate marketing. They help buyers understand the location at a glance while giving photographers and agents a professional way to showcase nearby amenities.
If you're looking to create better property listings, learning how to annotate drone photos is one of the easiest ways to improve your marketing and deliver more value to clients.