
How to Edit Aerial Drone Images for Real Estate Photography
Learn how to edit aerial drone photos for real estate photography with professional tips for colour correction, exposure, RAW editing, and creating engaging property marketing images.
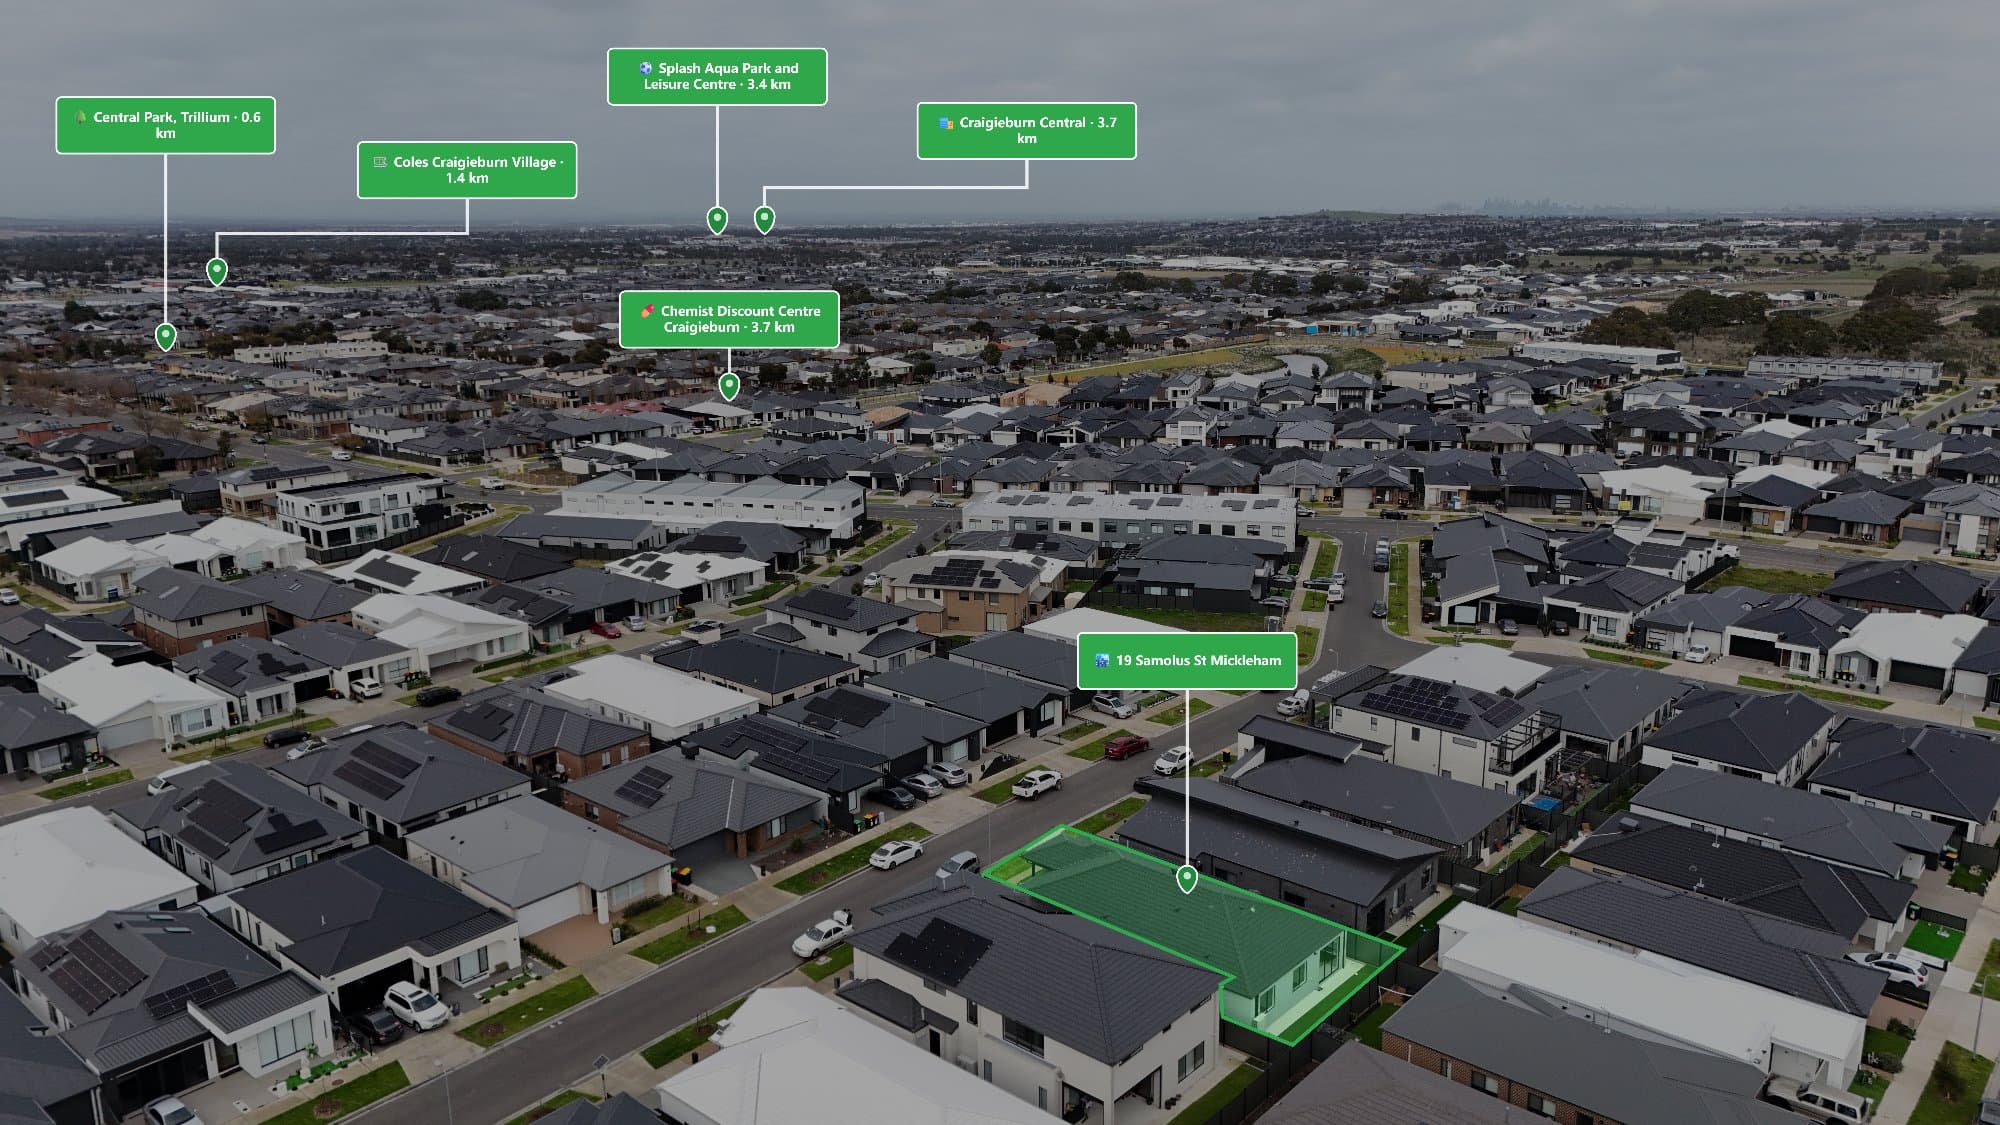
Aerial photography has transformed the way properties are marketed. A stunning drone image can showcase not only the home but also the surrounding lifestyle, location, and nearby amenities.
However, capturing a drone photo is only the beginning. Professional editing is what turns a simple aerial shot into a premium real estate marketing image.
In this guide, we’ll show you how to edit aerial images like a professional, including exposure correction, colour grading, removing distractions, and creating images that help properties stand out.
Shoot in RAW for Better Results
For the best editing flexibility, always capture drone photos in RAW (DNG) format.
RAW files allow you to recover details from:
- Bright skies
- Dark shadows
- Building textures
- Landscape areas
This gives you greater control when creating polished real estate images.
Balance the Property and Surroundings
Aerial images often contain challenging lighting conditions. The sky may be bright while the home appears darker.
A professional edit focuses on balancing:
✓ Sky detail
✓ Property exposure
✓ Natural colours
✓ Clean contrast
The goal is to create an image that feels realistic while making the property look its best.
Create More Engaging Aerial Marketing
Drone photography allows buyers to see more than just a house. It shows the location, neighbourhood, and lifestyle around the property.
With AerialPin, photographers can add interactive points of interest to drone images, allowing buyers to explore nearby schools, cafes, parks, transport, and landmarks.
Turn your aerial photos into interactive property experiences.
Explore AerialPin:
https://www.aerialpin.com
View Features:
https://www.aerialpin.com/features
Get Started:
https://www.aerialpin.com/pricing